
The aim of this guide is to help store owners set up a knowledge base using Google Site that can be used internally. With a knowledge base, a set of instructions and routines are efficiently and effectively implemented. This promotes consistency as well as convenience.
A Knowledge Base is a comprehensive set of processes and guides. The guides are usually step-by-step and commonly referred to as Standard Operating Procedures (SOPs).
An SOP is a set of written instructions that document a routine or repetitive activity. SOPs describe both technical and administrative operational elements of a business. An SOP is written with sufficient detail so that someone with a basic understanding of the field, can successfully reproduce the activity or procedure when unsupervised.
As such, if there is a need to control quality and costs then Standard Operating Procedures are needed. Standard Operations are a way of ensuring consistency; they should be viewed as the foundation upon which any improvement can be developed.
Applying this in a practical way means that every time we build a new eCommerce store or promote an existing store we can simply follow a system that we already know works well.
Fundamentally, every business is a system: a collection of processes that, together, reliably produces an intended result. The more you focus on improving business systems, the better results you’ll produce.
It’s as simple as that. When most people hear the word “system,” however, their eyes glaze over. Most of us are trained to think that standard operating procedures, checklists, documentation, and the like are boring and bureaucratic. Nothing could be further from the truth.
Here’s what happens when you begin improving your systems:
- You make more money but do less work
- You have more focus and energy to do your best work
- You make far fewer errors and mistakes
- You fix the mistakes you make quickly and permanently
- You feel more calm, collected, and under control
You can use the how-to guides from Small Revolution as foundation stones in your own Knowledge Base, and customize them to suit your own business. As such, the Small Revolution guides are deliberately created using simple and standardized document styles.
This will enable you to copy the content and paste into your own private Knowledge Base system, and then customize to your requirements. The documents cross-reference each other.
You can copy the full set of step-by-step SOPs or an individual SOP as you need them, but first, you need to set up your own account to hold all the SOPs.
Step 1: Setup A Google Sites Account
We use Google Sites to manage our Knowledge Base. It is a free, easy-to-use content management system. However, you can use any Content Management System that you prefer (eg: WordPress, Moodle or plain Microsoft Word documents etc.).
You can build a website for your organization as easy as editing a document using Google Sites.
With Google Sites, teams can quickly gather a variety of information in one place—including videos, calendars, presentations, attachments, and text—and easily share it for viewing or editing with a small group, an entire organization, or the world.
As a business user, you can use Google Sites to set up internal project sites, intranets, or public-facing sites. Read this guide for basic steps on creating a Google Site and customizing it for your organization. You’ll learn to:
- Create a new website
- Add and edit pages
- Insert maps, forms, video, and more
- Embed calendars, spreadsheets, and other Google documents
- Customize site layout and appearance
- Share your site for internal or external use
Step 2: Access Sites
Simply follow these steps to create a new site, or to view a list of sites that you own or can edit:
- Directly visit the page https://sites.google.com/
- Or visit from another Google app
When you have your Google Apps account open, click the App Launcher icon at the top right of the page and select Sites to access your sites list.
If you don’t see the link, make sure your network administrator has sites enabled on the Google Apps Admin console.
Step 3: Create Your Site
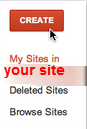
Click Create button from the Sites sidebar to make a new site.
Step 4: Use A Site Template
Decide whether or not you want to work from an existing site template. There are a lot of template options, ranging from public-facing business sites and work portfolios to intranets and training sites, pages for clubs and upcoming events. Each template features a topic-specific layout and professional appearance.
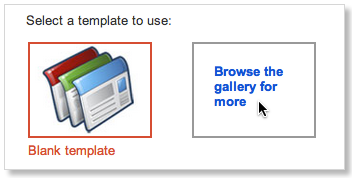
- Click Browse the gallery for more to select a site template. Here you can find any site saved as a template for your organization, or search public template categories.
- Select Blank template if you want to design your own site from scratch.
Step 5: Give Your Site A Name
Create a name for your site. Initially, this becomes a unique part of your site’s URL. If you want a different URL, just make the appropriate changes in the Site location field (don’t worry, this won’t change your site title).
For guidelines on choosing a URL, see selecting a location for your site.
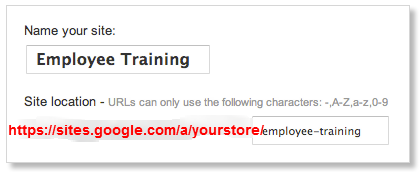
The URL you choose must be unique within your domain. You can change the name later, but you won’t be able to change the URL. If you prefer a fully customized URL that shows just your company name, such as www.yourstore.com, you may talk to your Google Apps admin about how to create a custom web address.
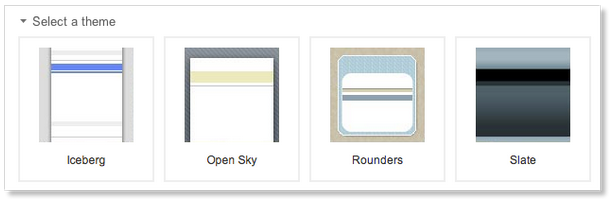
Step 6: Select Site Theme
Choose a theme for your site. Each option comes with a preset background, color theme, and font selection. You’ll be able to adjust fonts, colors, and the background later, and you can always change the theme or build your own custom theme once the site has been created.
Note: if you’re working from a template, your site might already have a theme. But you can choose another theme here, if you want.
Under More options you can categorize your site and enter a description to make your site more findable. Both fields are optional, and can be changed later under Manage Site > General.
Once you’re all set, click Create at the top of the page. Your new site will appear.
Step 7: Add Pages To Your Site
At first your site only has a home page and site map. To create additional pages follow these steps:
- Click the New page button in the upper right corner of the page.

- On the next screen, enter the page name. A URL is automatically generated for the new page, which you can change if you want. (Unlike with the site URL, you can change this later under More > Page settings > Page URL.)
- Then select a page template. You’ll see several options, each designed to help organize page content in different ways.
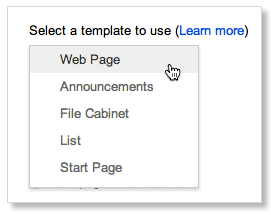
You can do most things with Web Page, like add text, insert photos, and embed other content. The other options have more specific functions. Click Learn more to pull up a guide to different page types.
If you make a page you might want to use again, you can create a page template.
- Choose where you want the page to be located within the site. Depending on what pages you already have, you can either nest your new page under an existing page or keep it at the top level.
Nesting the page will affect its URL. It will also add a sub-page link to the page one level up (you can hide this at More > Page Settings > Show links to sub-pages). Remember, you can always move pages later under Manage Site > Pages.
- Click Create.
Step 8: Edit Pages In Your Site
With Google Sites, you don’t have to be a web designer to make something that looks good. Editing a page is just like editing a document, although you can do much, much more than just adding text. And if you are familiar with HTML, CSS, or Javascript, you can enter code directly using our HTML options (see below).
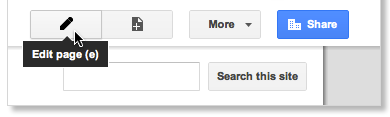
1. Click the Edit page button in the upper right corner to open the edit toolbar. (If you just created the page, the toolbar opens automatically.)
2. Using the features on the edit toolbar, you can add text, insert tables, and modify the page layout.

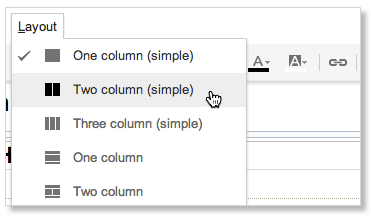
The Layout tab gives you multiple options for page geometry. For example, you can space out your page content by splitting it into columns, adding sidebars, or inserting rows.
You can add links to your page for internal site pages or external pages with the Link button.
Clicking <HTML> allows you to insert most HTML or CSS content directly. For more advanced coding, including Javascript, use the HTML Box under Gadgets.
Step 9: Add Objects, Apps, And Gadgets
Under the Insert tab, you can add a wide variety of objects, apps, and gadgets to enhance your site even further. This is also where you can embed Maps, Calendars, and Google Docs.
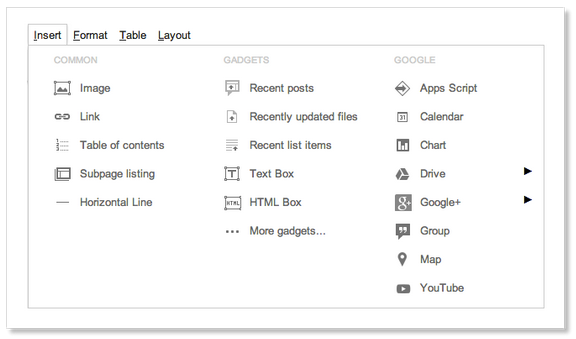
Some of the most useful apps and gadgets include:
- Calendar: Make sure your project stays on schedule by embedding a calendar that includes key due dates.
- Drive: Embed a Google Doc, Sheet, Slide, Form, and more. When the source is modified, the document updates automatically within Sites (this is true when embedding documents, spreadsheets, forms, and presentations).
- Map: Headed to an off-site meeting? Don’t just provide directions, embed a map!
- Youtube: Embed any Youtube video in your site.
- Recently updated files: Lists the latest additions/updates to files loaded onto the site.
Click on More gadgets to browse even more add-ins built by Google and third-party developers, or to search for a particular gadget. You’ll be able to preview each gadget before adding it to your site. For specific instructions, see Adding Docs, Calendars, and other gadgets.
For specific instructions, see Adding Docs, Calendars, and other gadgets.
Step 10: Customize Your Site
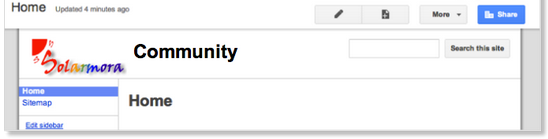
From the Edit site layout page, you can edit the site layout, add your organization’s logo to the header, and build the right site structure for easy navigation.
For more specific instructions, see Changing your Site’s layout and Changing your Site’s appearance.
Define Site Structure And Dimensions
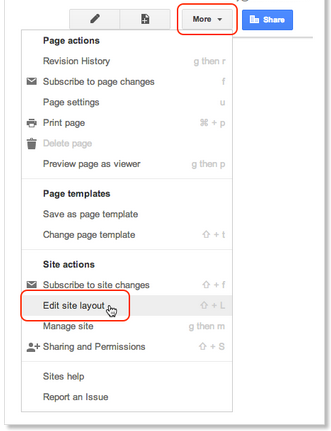
1. Click More at the top of the page and select Edit site layout.
2. On this page, you can specify site dimensions and what structural elements you want on all pages, such as the header, sidebar and footer. Click OK when you’re finished.
Once you’ve chosen your site’s overall layout, you can customize each component individually.
Customize Your Header

Something you’ll probably want to do is put your organization’s logo on the header.
- On the Edit site layout page, click the header to open the Configure site header page. You may already have a domain default image available. You can also upload a logo.
- To adjust the header alignment and height, select the alignments you want from the drop-down menus for Vertical and Horizontal alignment. Click OK when you’re finished.
- Click the Close button at the top of the page when you are finished.
Organize Site Navigation
It’s important to make your site easy to navigate for your users. In Edit site layout, you can add items to the sidebar and configure the built-in Navigation menu.
- Decide on the overall page structure. Do you want the sidebar on the left or right? Or does a horizontal navigation bar look better? Can’t decide? You can use both. Make these edits under Edit site layout.
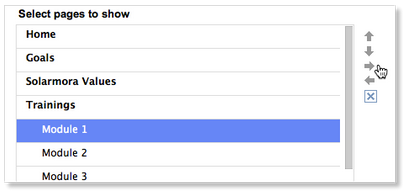
- Once you’ve added your navigation bar, click the navigation bar you want to edit to open the Configure navigation page. Using the arrows, arrange your pages in whatever order you want. By indenting certain pages, you can make them appear in drop-down menus for horizontal navigation or as sub-pages in a sidebar.
- Click OK and then Close in Edit site layout. Test out your navigation to make sure it’s what you want.

Adjust Colors, Fonts And Backgrounds
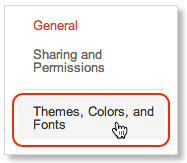
You can customize your site’s look by adding background colors or images to the content areas, header, or the entire page. Click More at the top of the page and select Manage Site. On the Manage Site page, select Themes, Colors, and Fonts on the left sidebar.
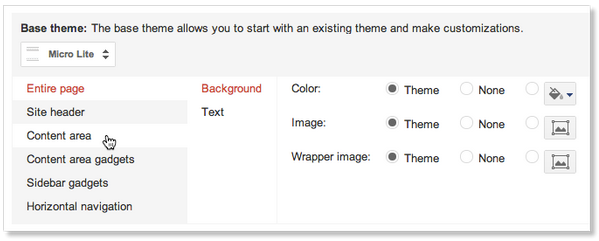
Here you can change the colors, fonts, and backgrounds across the site. The basic site page, the header, the text content areas, navigation menus, and gadgets are all independently customizable. Check the display on the bottom of the screen to preview your changes before saving them.
Step 11: Share Your Site
Now that you’ve created your site, share it with others! Decide first if you want to make the site public or keep it private inside your team or organization. You’ll also want to decide whether you want to open up the site for collaboration or limit others’ access to view only.
Share Publicly Or Across Your Organization
1. From any page, click Share in the upper right. This takes you to the Sharing and Permissions tab under Manage Site.
2. Find Who has access and click Change.
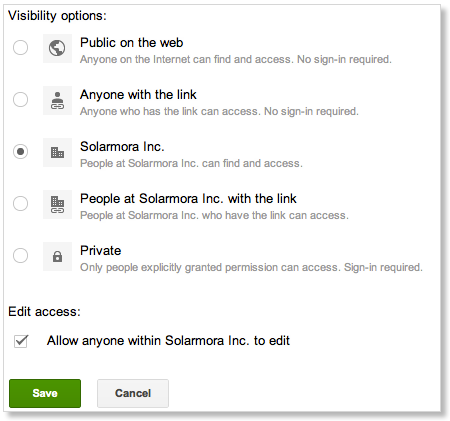
- Here you can set Visibility options to make your site public on the web, accessible only within your organization, or private for a list of specified users. You can also choose whether pages can be found via search, or accessed only by linking to it directly.
Share And Collaborate With Work Groups Or Teams
To restrict access to a specific group of people, or to give people different levels of access:
1. Click Share to open Sharing and Permissions in Manage Site.
2. Share the site by entering user names or groups in your domain in the address box, separated by a comma. Select the level of access you want them to have, and then click Share & save.
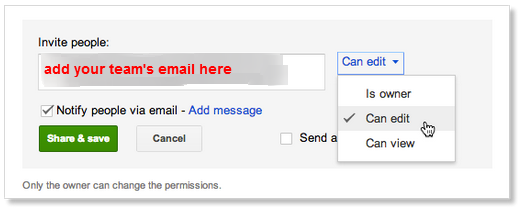
3. As the site owner, you can control who can view and edit your site by adding others as owners, collaborators, or viewers (see sharing your site for details on the three different access levels).
The default share setting allows all users in your organization’s domain to access and edit the site. To make changes, click Change.
Final Checklist
To set up a Knowledge Base in Google Site, here are the list of what you need to do:
- Create a site in Google site using your preferred template
- Give your site a name and select a theme
- Add pages to your site and edit them if necessary
- Add objects, apps and gadgets to your site
- Customize your site‘s header, navigation bar, backgrounds and fonts
- Lastly, share your site to your group or team