
The aim of this guide is to teach you, step-by-step, how to set up your own Shopify store in the shortest amount of time.
Setting up an eCommerce store seems like a daunting task especially if it’s your first time to do so. But don’t be afraid of this process because Shopify is a user-friendly platform that allows you to set up your store on your own.
One of the best things about Shopify is their 14-day trial wherein you can set up your store and add products without giving them your credit card details. This gives you the ease of trying out the platform without spending any money.
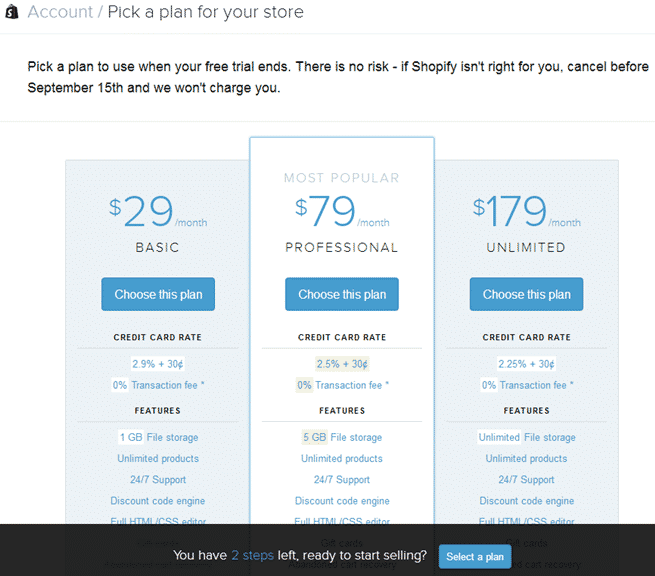
After the trial period, you can choose a plan that will suit your store’s needs and budget. Choose among their Starter ($14/month), Basic ($29/month), Professional ($79/month), and Unlimited ($179/month) plans based on what you need and what the platform has to offer (features, tools, apps, etc.).
You need to know this guide because it is easy and simple to set up an e-store on Shopify. The knowledge and experience you’ll get will also come in handy in the future if you decide to open up another eCommerce store using this platform.
Using Shopify’s 14-day trial, you can set up your e-store using the following steps:
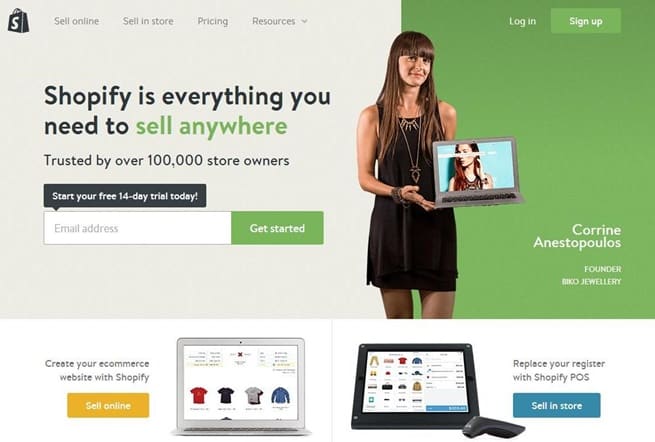
Step 1: Got To Shopify.com To Sign Up
Go to the homepage of Shopify and click on the ‘Sign Up’ button at the top right-hand corner of the screen.
Step 2: Enter Your Details
You will see this page after clicking the Sign Up button. Enter your email, password, and store name. Click ‘Create your store now’ once you’re done.

Step 3: Pick Your Option On ‘Where would you like to sell?’ Page
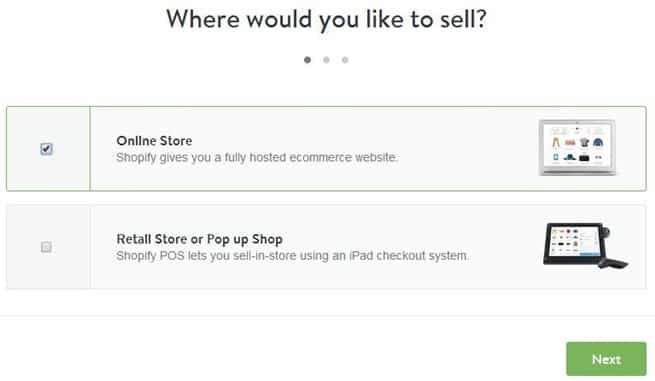
Generally for online sellers, the option to choose is ‘Online Store’. Tick the checkbox to choose this option. Click ‘Next’ to proceed.
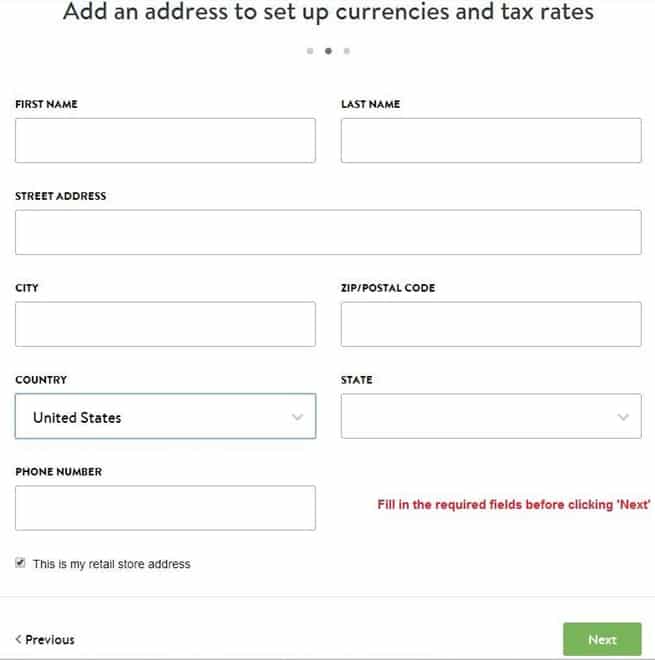
Step 4: Enter The Needed Information On The ‘Add an address…’ Page
Provide all necessary information. Click ‘Next’ once you’re done.
Step 5: Provide Additional Information
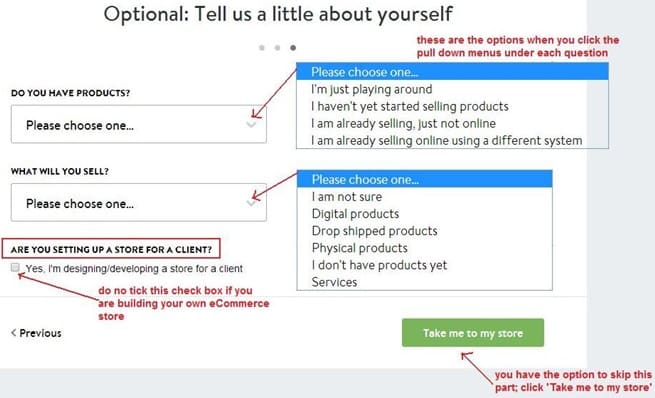
Although Shopify specifies this page as ‘Optional’, it’s best to provide the info they’re asking for on this page.
Step 6: Choose A Theme
On the left-hand side of the dashboard, locate and click Themes to open up the Theme Store. You may choose a free or paid theme based on your needs and budget.
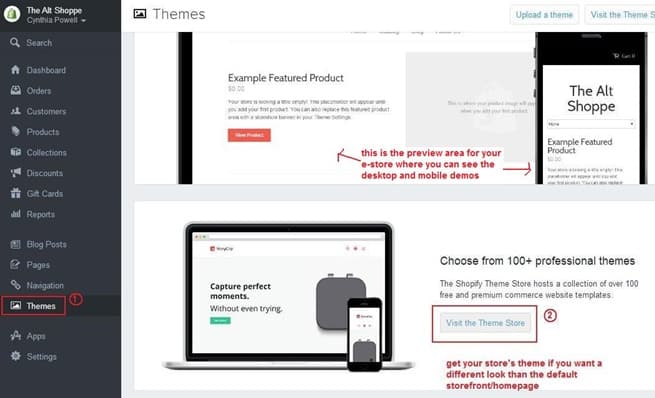
Filter other options based on free or paid, by industry, by features, or just sort them if you wish.
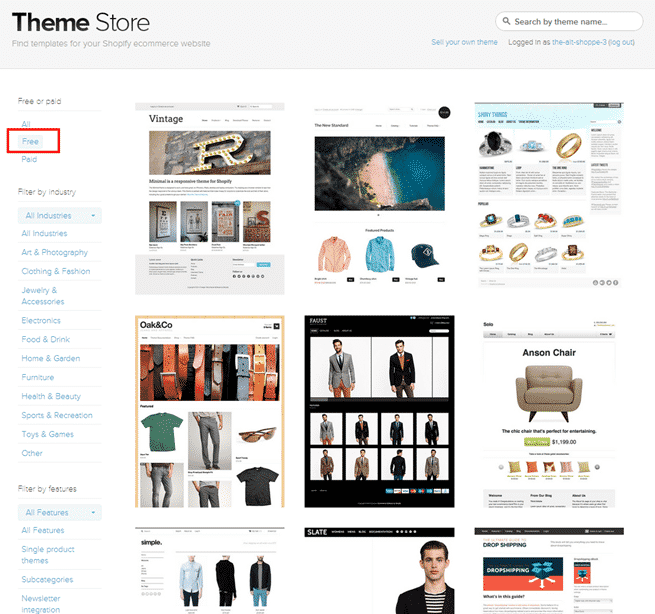
Pick the theme you’d like to use on your e-store and make sure to check the description and reviews on the next page.
Below are the details you’ll see after picking a specific theme:
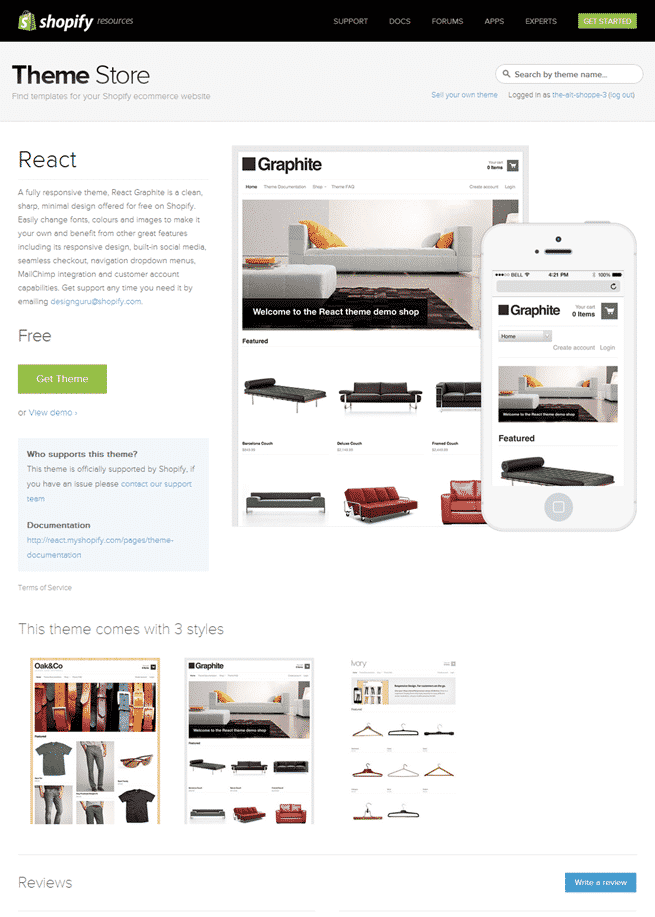
You will see if there are different styles and a mobile version of a theme in demo mode. Check the details and reviews before making a final decision.
Step 7: Get And Publish Theme
Once you are decided, click the green ‘Get Theme’ button (as shown on the above image).
Shopify will ask you to confirm on the next page. Click ‘Publish as my shop’s theme’ to confirm.
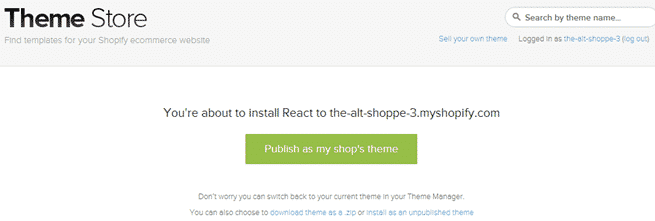
Even if you’re not 100% sure of the theme you picked, you can still change it later.
Step 8: Customise Your Theme
In case you want to customise your store’s theme to make it more unique and in accordance to your products’ color scheme, for example, you can do so by clicking the Themes on your dashboard.
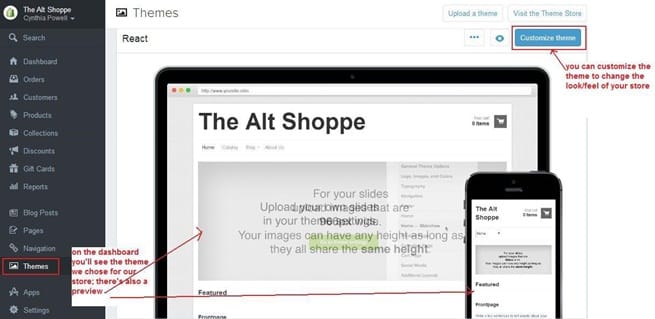
Click ‘Customize theme’ to update elements such as color, collection pages, buttons, and other options.
Step 9: Add Products
To add a product to your e-store, click the ‘Products’ tab on the left menu. Then, click ‘Add a product’.
Step 10: Add Product Details
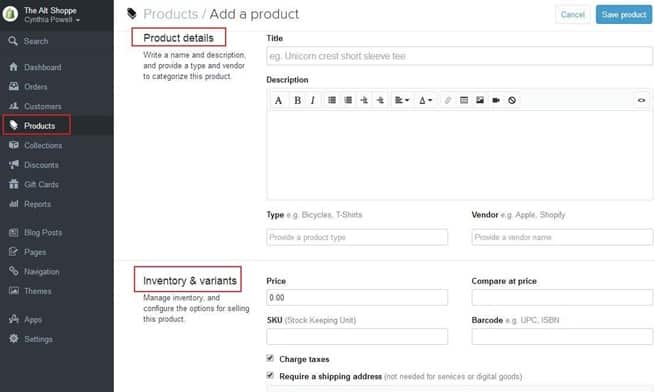
(1) You will need to add the following details for each product:
- Product title
- Description
- Type (type of product – e.g. bikes, shirts, toys, etc.)
- Vendor (vendor name – e.g. Chappelli Bikes, Gap, Fisher Price, etc.)
- Price
- Product image
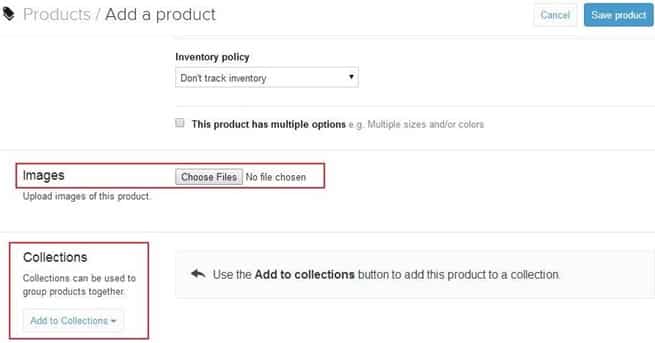
(2) You can tick the check boxes to ‘Charge taxes’ and if products ‘Require a shipping address’ (not applicable for digital types).
(3) You will need to input the product ‘weight’ for shipping fee calculations.
(4) Other advanced product details are optional. But if you maintain a large stock of products, the following info will make it easier for you to track your inventory:
- Compare at price – You can use this to show that your prices are lower than your competitors.
- SKU or Stock Keeping Unit – Stock code for inventory keeping.
- Barcode – Line code used for product data.
(5) Also set your inventory policy if applicable.
(6) Tick the check box for ‘This product has multiple options’ (e.g. multiple colors, sizes, etc.) if applicable.
(7) You can also add collections which can be used for product groups, if you have any.
(8) Enter SEO (search engine optimisation) data for each product such as tags, page title, and meta description. You can check our how-to guide regarding product pages if you are not familiar with these SEO elements.

(9) Make sure your product is ‘visible’ if you want it seen on the storefront. Otherwise, choose ‘hidden’.
Step 11: Click ‘Save product’
Review your entries and choices on this page. Then, click ‘Save product’ once you’re done.
Step 12: Update Your Store’s Navigation Menu
The theme you choose for your e-store has a default set of navigation elements on the footer and main menu.
Essentially you’d want to keep About Us, Search, and Blog pages for user experience and inbound marketing purposes. Check out our guides to help you create great content for these pages.

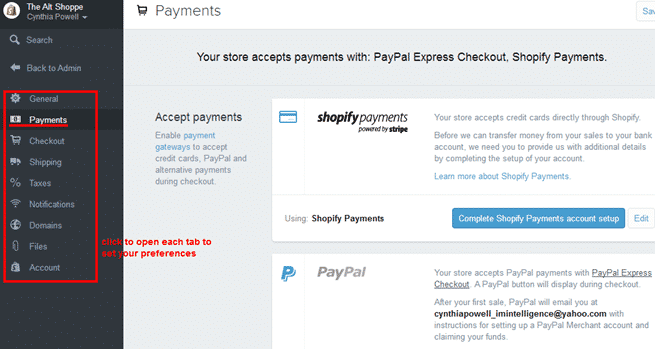
Step 13: Confirm/Update Store Settings
Go to ‘Store Settings’ to set payment methods, taxes, shipping rates, checkout, and general info. Make sure to click each tab to set and/or confirm items based on your preferences.
Step 14: Launch Your Shopify Store
If you are ready to launch and make your store live, just click on ‘Select a plan’ button on the banner that appears on every page of the store’s admin dashboard.
You need to provide your credit card details after selecting a plan. Billing starts 14 days after creating your Shopify account.
Final Checklist
There’s always an eminent fear of trying anything the first time, including setting up your own eCommerce store on Shopify. But don’t be afraid to try and play around with this platform because it is easy to use and has a 14-day trial for you to check out the features and see if this is the best option for your store.
- Sign up on Shopify.com and fill in the details on the next pages.
- Review and choose a theme for your store.
- Publish and customise your theme if you want a unique look and feel.
- Add products to your store.
- Add product details including SEO meta tags, descriptions, and page titles.
- Update the navigation items for better user experience and inbound marketing purposes.
- Update your store’s settings accordingly.
- Select the right monthly plan and launch your Shopify store.
Photo by lifeforstock / CC BY