
The aim of this guide is to help you, step-by-step, improve your product photos. We show you how to make the most of a DIY setup (for the photo shoot) and (image/photo) use retouching to boost customer interest and sales.
If business is just starting out, and budget is tight, that doesn’t mean you can no longer produce good quality product photos.
DIY Photoshoots can be done at home or anywhere suitable. All you need is your creativity, resourcefulness and this how-to-guide.
Step 1: Aim For Good Quality Product Photos As These Will Help You Sell
The products you sell on your eCommerce store are the lifeline of your business.
To make your products more interesting to customers, you need to take beautiful photos to boost their visual appeal.
You have to make them look as if a pro photographer took the shots, so the resulting images are crisp, clear, and clutter-free.
The statement below is a good overview of how quality product photos can help your eCommerce store sell more.
“Everything in an image – quality, subject matter, color theme and saturation – should speak in a uniform voice that resonates with your target audience.” – Bigcommerce
It is also a good idea to put yourself into your customers’ shoes in order ‘to see what they see’.
Ask yourself these questions:
Do I like what I see?
Should I buy it?
Is it worth my money?
People who visit your eCommerce store are likely to think and ask these questions while looking at your products. They can’t see and feel them in real life, so giving them a visual representation through quality photos is a must to make them say “yes, I like it and I’m gonna buy!”
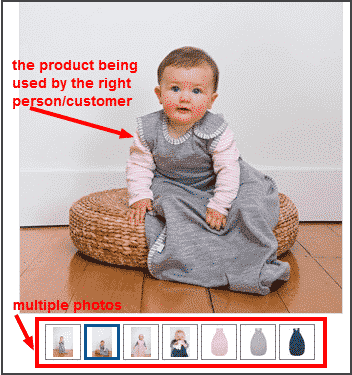
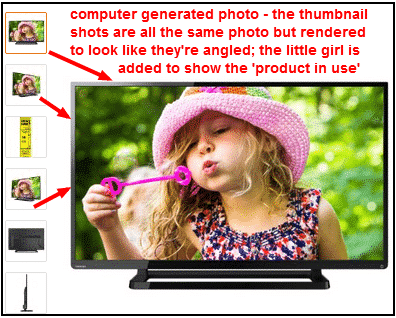
Also, you need to provide multiple product photos to make sure that the customers will see different views and angles of your product.
If you are selling something for a specific age group, for example, you would want to show a photo of that product being used by the right person.
If you are selling children’s clothing, for instance, it is a great way to photograph the product with a child using it. You’d want to show how the product is used and who the targeted customer is by using product photos.
The photo below perfectly exemplifies the aforementioned points.
Step 2: Select The Best Photo Formats To Use
You can take your multiple product photos to the next level by applying different formats.
The idea is to present your products in various situations and angles, and to provide more information if applicable. Having different photo formats, your products will have more depth and dimension that look appealing to customers.
Below are some examples you can try for you own product photography shoots:
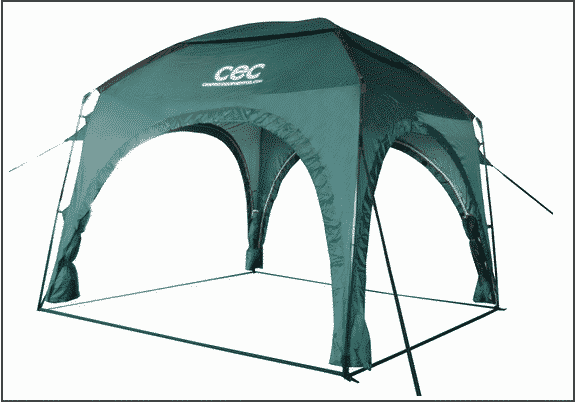
Hero Shot Photo – This is basically a shot of your product with framing, composition, lighting and setting intended to make it look good.
The ‘hero shot’ is often used to show product details and main features.
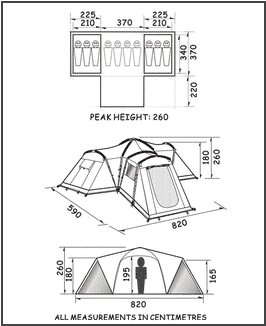
‘How to Use’ Photo – Some of these diagrams look like infographics that are printed on paper and included in the actual product. These are great to use for products that require assembly or minor construction.
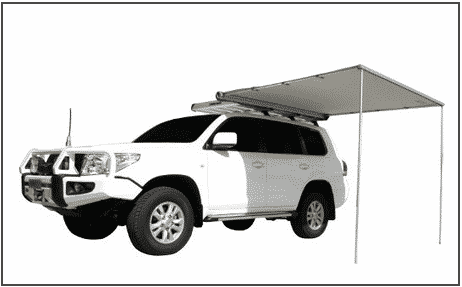
‘Real World’ Photo – This type of shot enables your customers to see the product in context. This shot of an RV shade awning includes a real RV with the product attached.
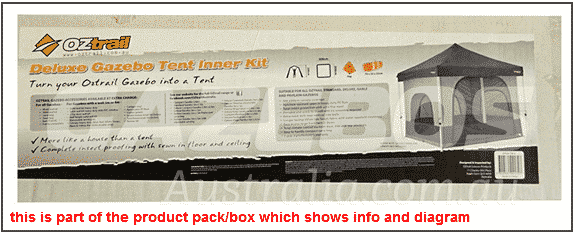
Pack Photo – Some instructions about a product are printed on the packaging. If this applies to your product, it is best to take a photo of the pack and include it on your product page as a way to inform customers.
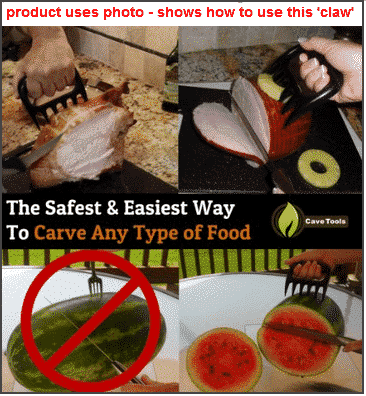
Product Uses Photo – Photos of product uses are quite important for certain products especially if they are unique or never-been seen by many customers.
In the photo below, it shows different ways to use the ‘claw shredder’.
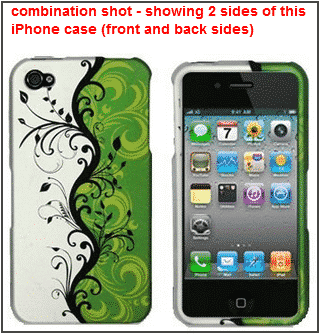
Combination Photo – A combination photo shows two shots of the same product in one photograph and it is often used to show specific product features, views, or angles.
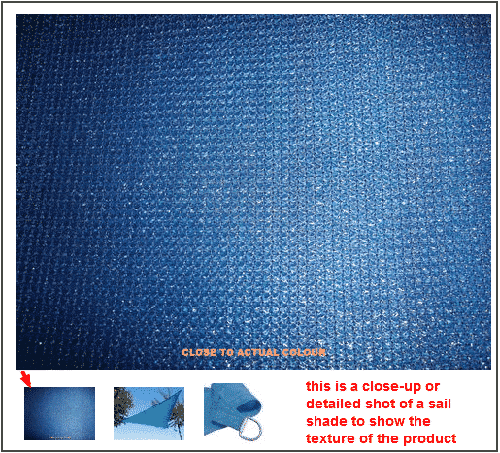
Detailed Photo – Detailed photos are ‘zoomed in’ shots and they’re great for showcasing the texture, material, design, and minute features of certain products.
Computer-generated Photo – Computer-generated photos are highly rendered using Photoshop.
This type of format is great for producing multiple views or angles, and for adding ‘extra elements’ that weren’t included in the original shot.
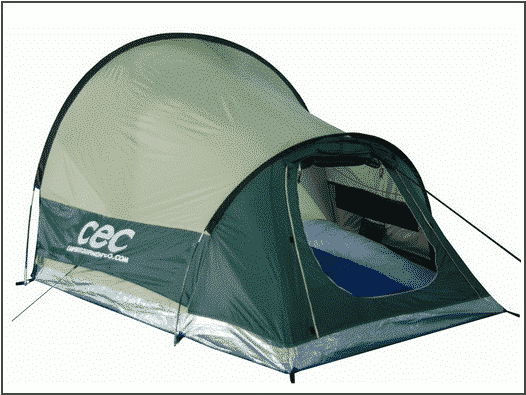
In-situ Photo – In-situ shots are great for showing the product in use and in a supposed environment. The product here is the muslin cloth held by the woman’s hand.

Angled Photo – Showing ‘out of sight’ features, dimensions, and size of a product can be done using angled shots.
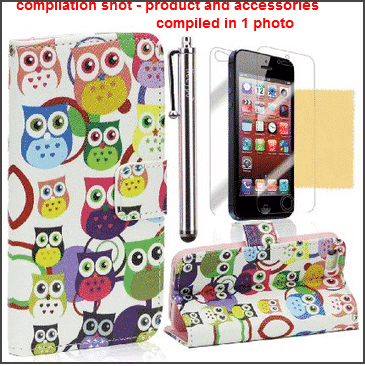
Compilation Photo – Various shots of the same product can be showcased in one photo using compilation shot.
Just be careful not to overdo it because if you do, the resulting product photo may look cluttered and unappealing.
Good quality photos of your products are incredibly important for the viability of your online store. If your customer can’t see what they are buying, they are obviously less likely to buy.
But not everyone can afford a professional photo shoot for their products so here are some tips for making the most of what you can do with a DIY setup.
Step 3: Improve Your Setup
Background

If you decide you want your products to be displayed on clear background (and not in what you might call a real life setting) it is a good idea to photograph them against a uniform background.
A large clean sheet of paper bought at your local art supplies store can serve this purpose very well for homemade product photos.
Prop up the top side of the paper against something that will hold it (tape it to a cereal box or a stereo speaker, or something else that corresponds to the size of the sheet of paper you are using; or ask a friend or coworker to hold up the back side of the paper) and let the bottom side fall on the table.
Do not bend it, fold it, or otherwise create creases in it – let gravity work for you and create a smooth curve in the paper.
Useful link: How to Make an Inexpensive DIY Light Tent
Lighting
Good lighting makes for at least 50% of a good photograph.
In the absence of a professional photo studio, you should try to use indirect sunlight to shoot your photos.
Place your improvised background close to a window (north window if you are in the northern hemisphere, south if you are in the southern) and photograph your products in the couple of hours before and after noon.
This will ensure several key elements check out:
- Your photographs will have plenty of light which will help you make sharp images free of digital noise
- By using daylight as the light source instead of artificial lighting you will avoid color casts and noise created by non-full spectrum lighting
- The shadows in your photos will be soft as a result of using indirect, diffuse lighting
- By doing the work around midday you will stay close to the ideal color temperature
If you have to shoot with artificial lighting, try to avoid mixing different light sources. The difference in spectral characteristics and color hues of many different lighting sources will not help your product photos.
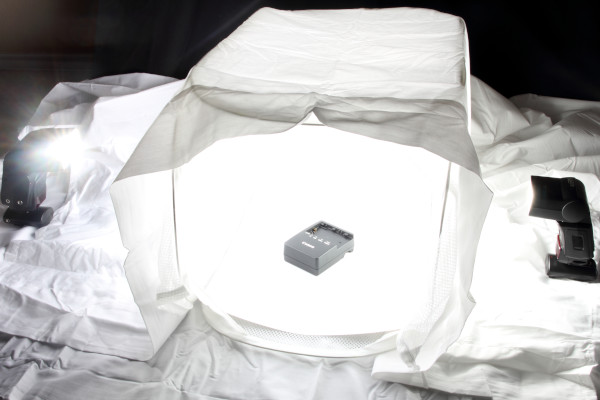
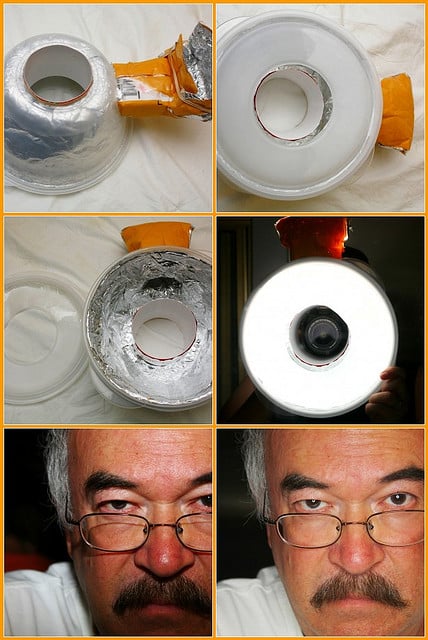
Improvised Ring Flash

Photography equipments are really expensive, but this shouldn’t be a hindrance to give you quality photo outputs.
We can make use of your creativity to make DIY materials instead of the professional ones.
Just like creating your own DIY studio, you can also create your DIY ring flash to create bright lights and improving your photo captures.
To do that, you simply need to get an old strobe and an old plastic container and cover it with aluminum foil. You can also refer to PetaPixel if you need more details.
If you are using a flash to light your photos, try to point it upwards against a white ceiling to diffuse the light and avoid hard shadows.
If your camera does not have a movable flash, take a look at these guides to making your own DIY flash diffusers:
Links: DiyPhotography
All Day I Dream About Photography
Camera Settings
Most digital cameras will allow you to control the following settings and increase your chances of making a quality product photograph.
ISO Setting
the ISO value describes the sensitivity of the CCD sensor in your camera – the higher the ISO setting the more sensitive your camera is to light.
Higher ISO values allow you to make shots in low light conditions at the cost of introducing a lot of grain and noise.
Lower ISO settings produce smoother and sharper photos – provided you have lighting of sufficient intensity.
Many cameras set on “Auto” mode will adjust the ISO setting in addition to shutter speed and aperture. Consult your camera manual to determine if you can set your ISO speed manually.
If you can, always try to keep it as low as possible. ISO 100 should be the default value you use when making your photos, and you should not go beyond ISO 200 under any circumstances.
White Balance
Many cameras will allow you manually set the white balance and thereby ensure the photos you take have the correct color values. Consult your camera manual to determine whether or not you can manually adjust white balance.
Use the clear sheet of white paper which is your improvised background to set the manual white balance.
If your camera does not allow manual white balance, you will most probably have to choose between presets, the most common of which are “Daylight”, “Incandescent”, “Fluorescent”, “Cloudy” and “Auto”.
If you are stuck with presets, avoid using the “Auto” option – it makes your camera make an educated guess (which is inaccurate more often than not) with each new shot. If you are following our advice on using indirect midday sunlight choose the “Daylight” preset.
If you are shooting with artificial lighting go for the “Incandescent” or “Fluorescent” settings, depending on the kind of light source you are working with.
The following video is specific to Canon cameras, but should help you get a better understanding of the process regardless of your camera make and model:
Video from Magic Lantern DVD Guides! Link: YouTube
Step 4: Set Up The Photo Shoot
Keeping It Sharp
If you followed our advice on lighting, you should be able to get enough light on your products to be able to shoot from hand. If your photos are still turning out blurry the most likely reason is the lack of light, which prompts your camera to adjust shutter speed to a thirtieth of a second or slower.
One solution for this problem is to try boosting the light level by using your camera’s flash coupled with one of the DIY diffusers mentioned above. A better solution is to turn to tripods.
While most professional photographers would not settle for anything less than a full size ball-bearing tripod, there are small tabletop tripods out there (some as cheap as $5) that will do the job just as well.
Yet another alternative exists in the form of this homemade camera stabilizer:
Video from Cobbler Videos Link: YouTube
Picking Your Spots
One of the crudest mistakes, and one of the easiest to avoid is choosing the best position and angle from which to take your product photos.
Horizontal position: you want your camera to be centered along the width of the background and facing it head-on. If you want to display side views or back views of your product, or anything in between, rotate the product instead of moving the camera.
By keeping the camera in place you ensure the least amount of interference from light that may be coming from the sides of the setup, as well as improve consistency across photos of different products.
Height and vertical angle: choosing the right height and vertical angle for your shots can make all the difference.
You don’t want the camera shooting up at the product, and you definitely do not want it to be shooting too steeply down.
The best practice is to try to make photos look like they are just below the eye level, so look for a height that lets the customer see a little of the top side of the product.
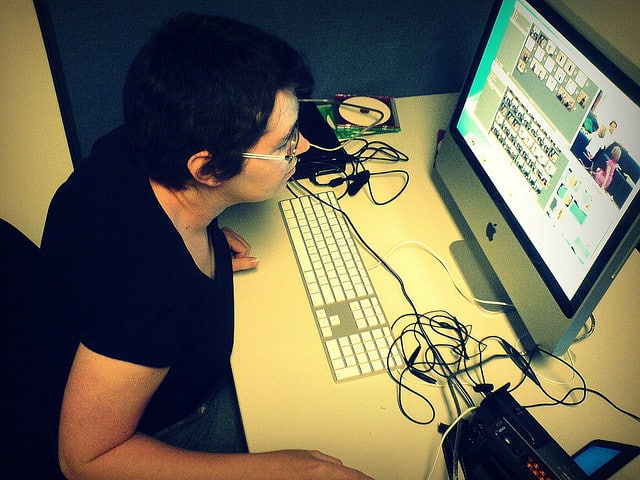
Step 5: Retouch Your Photos
To Photoshop or not to Photoshop, that is the question.
The scope of adjustments a professional photo retoucher can make to a photograph in Photoshop is staggering. So is the difference in the amount of work hours they will take and the price tag attached to it.
The very basic adjustments include: elementary color correction (removing color casts from photos), cropping the photos to a uniform size, optimizing them for web (in order to improve load times and minimize bandwidth usage) and watermarking them with your logo.
Since only around 30% of this work is done manually while the rest is automated with Photoshop actions you can expect this process to be inexpensive and completed very quickly.
Assuming you have followed our DIY product photo advice and provided decent quality photos, a professional who knows what he is doing can easily process around 50 photos per hour in this manner.
Beyond this, the adjustments you are most likely to be interested in are: removing dust and scratch marks, cutting out the product to produce either a clear white background or transparency, adding reflections at the bottom of the product image etc.
The best way to make an estimate of how much this would increase the work time and the cost is to speak to the retoucher directly, providing them with samples of your product photos.
This guide is intended for store owners with very little to no experience with professional photography.
For more advanced guides you may want to take a look at these:
Beginner: Light Stalking
Intermediate: Discover Digital Photography and Light Stalking
Advanced: ENVATO TUTS+
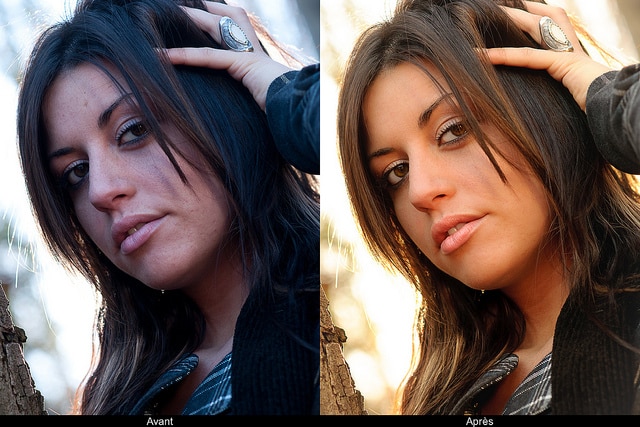
Getting a professional to model your products may be quite expensive and they might not be able to accommodate DIY shoots.
To make product shoots cheaper and fun, you can actually use a friend’s help to model your clothes and accessories for you. Then you can do a retouch to make them look perfect.
Whiten Teeth
One thing that we need to retouch is the model’s teeth. Take note that a smile on a model’s face is an important factor as it does not only attract the attention of the viewer but also create positive vibes.
You can whiten the teeth of your model by using your friendly tool – the Photoshop.
To do this, open your image on Photoshop, then select the teeth portion, using any selection tool then refine the edges, decrease the saturation, and increase the lightness. That will make the teeth appear perfectly white.
Smoothen Skin
It would be bad to have your jewelry or accessory product photo modelled by a friend who has a distracting pimple or freckles on the face. This might even be a turn off for your potential customers.
Although what they’re after is the product, how you present your product can affect their purchasing decision.
So with the help of Photoshop, we can correct this and make the skin look perfectly real but a little bit smoother.
Add Make-Ups
When your selling hats, or jewelries or eye wear, it is important that the face looks good, you can also add post-production make ups if in case you’re not satisfied with the original photos.
If there are blemishes, freckles or imperfections on your model’s skin, you can easily improve them through Photoshop. Having them enhanced will make them more attractive and professional.
Here are some suggestions:
- Use the right brush to erase imperfection, and adjust the hardness and opacity depending on the need.
- Set a contour makeup to give emphasis to the model’s facial features. Ideas like sweeping the color along the underside of the cheekbones, side of the nose and the temples.
- Add a soft lipstick, eyeshadow as well as eyeliners if it’s necessary to stress them.
- Make sure to check the photo and that it appears perfect yet real.
When retouching your photos, make sure that your enhancements are minimal and realistic.
You may check on this YouTube Tutorial if in case you need help on retouching your photos:
Video from wbactions Link: YouTube
Learn From Others
These are some of the best product photos you can find and learn from.
Look at the way the store owners use backgrounds, styling, lighting, and their products. Some of them are amazingly very simple and captivating.
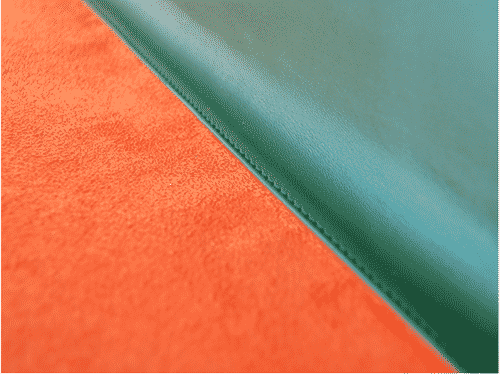
Example 1: Focus On Detail
Detailed product photo showing flawless seams that exude craftsmanship.
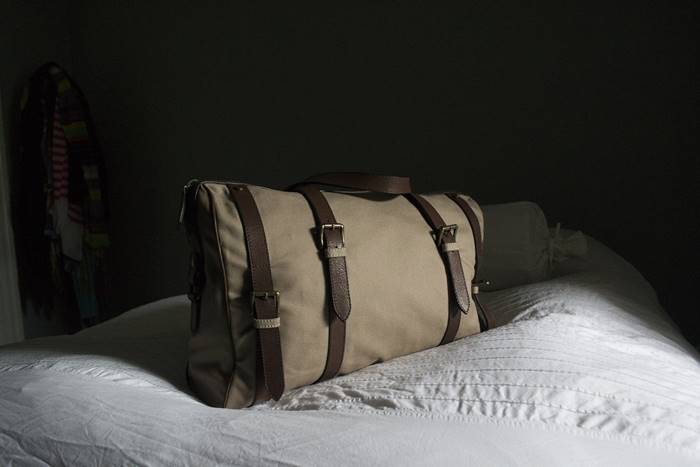
Example 2: Set The Mood
Setting the scene to create a real-life ‘look and feel’ for this product.
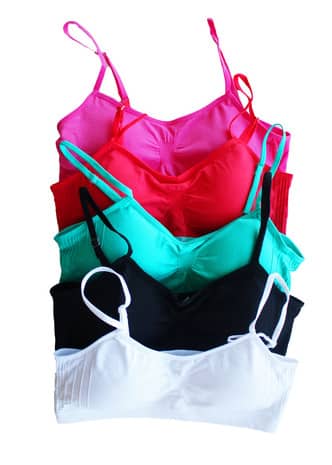
Example 3: It Comes In Different Colors
If you sell one type of product that comes in multiple colors, this is one way to show off all of them – white background, simple product arrangement, but very eye-catching especially for women shoppers.
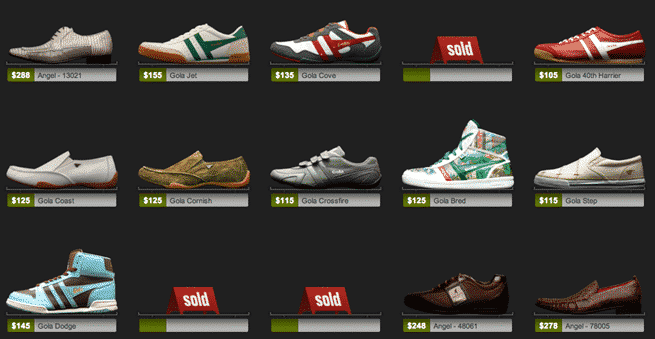
Example 4: “Step Into My Store”
The example below makes you feel as if you’ve stepped into a real shoe store. And that’s exactly what you want your customers to feel when they visit your eCommerce store.
Example 5: Style To Please The Eye And Appetite
If you sell food products, you’d want customers to feel hungry just by looking at the photos on your eCommerce store.
This photo of a box of sweets is styled in a simple manner using white background; and yet it is very pleasing to the eye (and appetite).

You can see more examples here for inspiration.
Final Checklist
Making your own DIY Photo shoots may not be as great as the pros, but that doesn’t mean we can’t get good quality photos that we need. Resourcefulness and creativity is the key. To help you get the results that you need, take note of the following:
- Apply your resourcefulness and creativity to improve your background, lighting and photo shoot setup
- Set your camera with the right ISO and White Balance settings
- Set up your photo shoot location with the right spot and angle
- Retouch your photos to enhance features and improve the quality