
The aim of this guide is to help you understand WHY YOU NEED TO CHECK your store and HOW YOU CAN DO IT PROPERLY by using various tools, resources, tips, and ideas.
After months of hard work and preparation you are now ready for your online store to go live. Some store owners “take the back seat” when they’re finally going live with their website.
But most of them don’t know that right before the launch of the site is one of the most, if not THE MOST IMPORTANT MOMENT, because a lot of things can go wrong in a heartbeat.
This is why you need to find the problems first before your customers or worse, search engines like Google or Bing find them and harshly penalize you for it.
So what do you need to do right before the launch of your online store exactly?
Well there are a lot of things to check such as testing out the:
- Website functionality
- Checkout & payment systems
- SEO
- And many more
This might be too much to handle right now and that is why we’ll focus on checking the search engine optimization of your store first.
So let’s get started shall we?
Step 1: Check If Your Metadata Needs Improvement
People nowadays use search engines to find everything on the internet and this is why optimizing your search engine results page (SERP) display is a major part of any online store’s success.
To properly optimize your site’s SERP display you need to fill out the metadata of each web page which includes the title and meta description.
Below is an example of SERP when searching for camping equipment on Google.
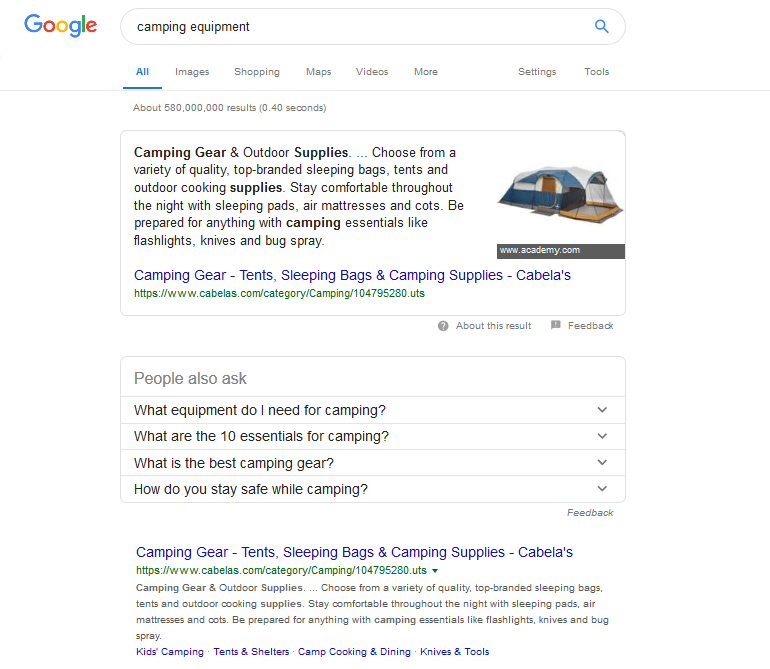
The first search result has an optimized meta description but the title is too long thus it is being replaced by “…”.
NOTE: This also happens if your meta description is too long.
Google has a character limit you can use for web pages. The title tag only has a 70 character limit (including spaces) meanwhile the meta description has a 156 character limit.
Other search engines will obviously have different limits to what they display on their SERP, but Google is mainly used as the standard SERP display test.
There are multiple ways to check the metadata of your online store but for now we will be using Google Webmasters Tools.
Once you’ve logged in and added your site to Google Webmasters Tools you will be taken to the Search Console Home.
You will be displayed the different sites you have added to Google Webmasters Tool and then you simply click which site you want to check the SERP display and metadata.
Doing this will take you to the Dashboard where you will click on the Search Appearance tab as shown below:
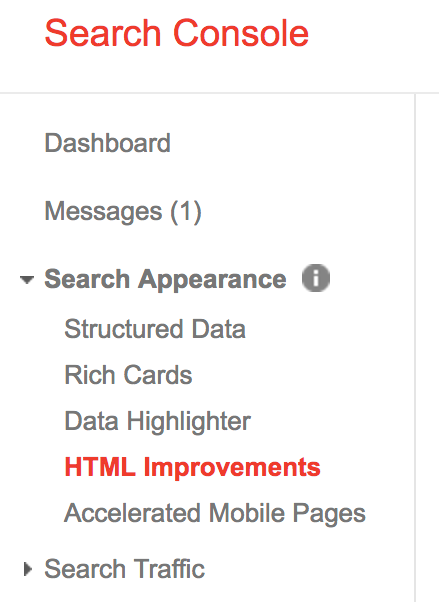
You’ll be shown a drop-down menu where you will click on HTML improvements which will show important information and data regarding your site’s metadata.
For now the important things to look at are:
- Long meta descriptions
- Missing title tags
- Long title tags
- Non-informative title tags
If any of your site’s web pages can be improved then the number of web pages will be shown on the right side. You can click on the links to view which web pages’ metadata can be further optimized.
Long title tags and meta descriptions are web pages that have exceeded the character limit that you want to display on the SERP.
Missing title tags are a real problem since Google will automatically generate one for those web pages if you haven’t set them already.
Non-informative title tags will be penalized by Google by removing the opinions or subjective words such as “Best”, “Amazing”, or “Reliable”. The only exception to this rule is the home page of your site.
Step 2: Check Your Google Webmaster Tools and Google Analytics
Your online store should have at least one or two analytics tools implemented and most of the time it’s Google Webmaster Tools and Google Analytics.
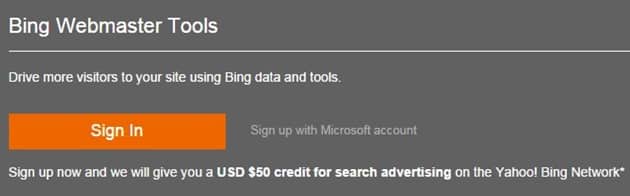
Bing Webmaster Tools have gained in popularity nowadays so it’s recommended to have your site submitted there as well.
Log in to your Google Webmaster Tools account and you will be taken to the console home. From there you will already see if your store has been submitted or not as shown below.
If your site has not been verified it will be labeled as such as shown above. You will also see recent error messages related to your site.
Ask your webmaster to submit your site to Google Webmaster Tools if it hasn’t been done yet. Also ask them to verify the property if it hasn’t been done already.
You should also ask them if the error messages are something to be worried about or if they can be dealt with later on.
You can also check the messages on the right side of Google Webmaster Tools to view messages such as:
- Pages that have been infected with malware
- Verification notifications
- An increase in 404 redirects
- Other security related problems
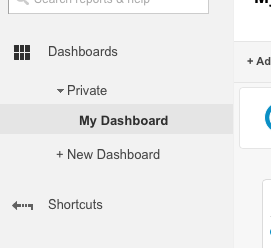
You should also check if you have linked your Google Analytics account to your Google Webmaster Tools. Just log in to your Google Analytics account and click on your store.
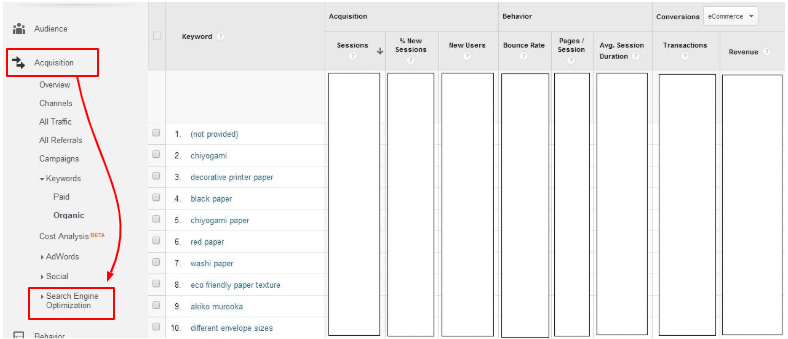
From there you will be taken to the dashboard and you will click on the Acquisition Tab on the right hand side, then click on Search Engine Optimization, and Queries tab.
If you see a graph like the one below, then you know that Google Webmaster Tools has been linked to Google Analytics.
Step 3: Check If Your Site Has Been Submitted To Bing Webmaster Tools
To check if your store has been submitted to Bing Webmaster Tools simply log in to your account and you’ll be taken to the dashboard.
You will immediately see a list of the sites that you have added to Bing Webmaster Tools and if your store isn’t there you should go ahead and talk to your webmaster about it.
You can also see the messages that Bing has sent you regarding the errors or notifications to your site.
Have a look at them and address it to your webmaster if there are any serious issues that need to be dealt with immediately.
Step 4: Check Your Internal and External Links If They Are Broken Or Not
A lot of people automatically assume that linking within their online store or other websites just works. But as time goes on many of these links will get broken in one way or another so you need to regularly check both internal and external links on your site.
There are plenty of tools available on the internet that will help you check if the links of your store are working properly.
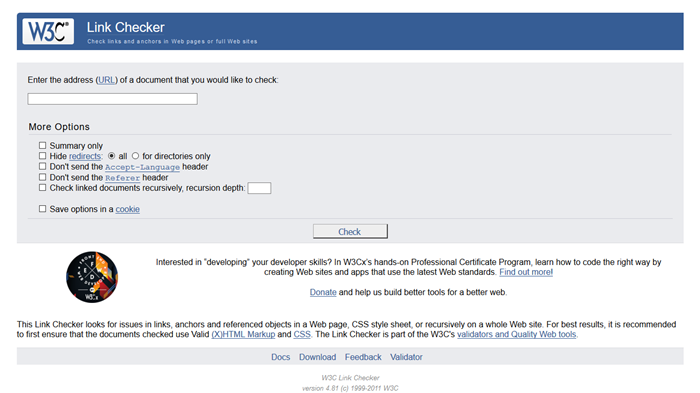
But in our experience we recommend you to use W3C Link Checker since it it gives you a very in-depth analysis of every link that can be found throughout your store.
To check if all the links in your store are working properly, go to W3C Link Checker and type in your store’s URL (e.g. http://example.com) and with the settings shown below.
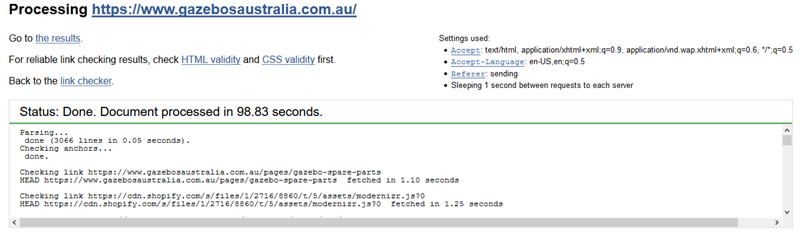
After the checking process is completed you can check for the broken links by scrolling down to the Results section for every page of your site and it will look something like this:
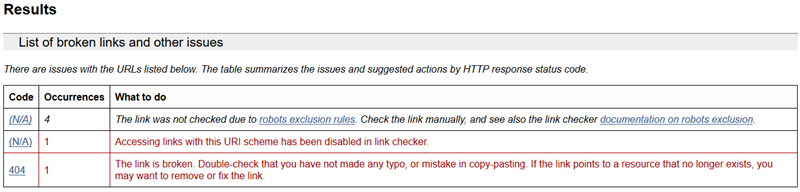
As you can see there are multiple errors on this specific page of the example site. But this doesn’t necessarily mean that your store is in “dire straights”.
You just need to speak to your webmaster and confirm if that the broken links are really broken or are working as intended.
NOTE: DO NOT CLOSE the W3C Link Checker results just yet since we will be using them in the next step.
Step 5: Check Your 301, 302, and 404 Redirects are Working Properly
URL redirects are an integral part of SEO and there are three main types:
- 301 Redirect
- 302 Redirect
- 404 Redirect
The 301 redirect is a permanent redirect from one URL to another and by using this type of redirect you can carry over the search engine rankings from the old to the new URL. As you can see this is probably the most important out of the three redirects.
The 302 redirect on the other hand is a temporary redirect from one URL to another and does not pass any of the search engine rankings from the old URL and if you mistakenly use this, it will definitely hurt your site’s search engine ranking and visibility.
Meanwhile the 404 redirect is a simple redirect to a page that doesn’t exist or has been removed.
This doesn’t really have anything to do with search engine and is just used to notify your visitors that what they’re looking for isn’t there.
To check if the redirects of your site are working properly, you use the W3C Link Checker again. If you haven’t closed the results of the previous step, then you won’t have to wait for the checking process to be completed again.
Once the results of each page are displayed below, scroll down to the “List of Redirects” section where you will see if the redirects are working properly and it will look something like this:
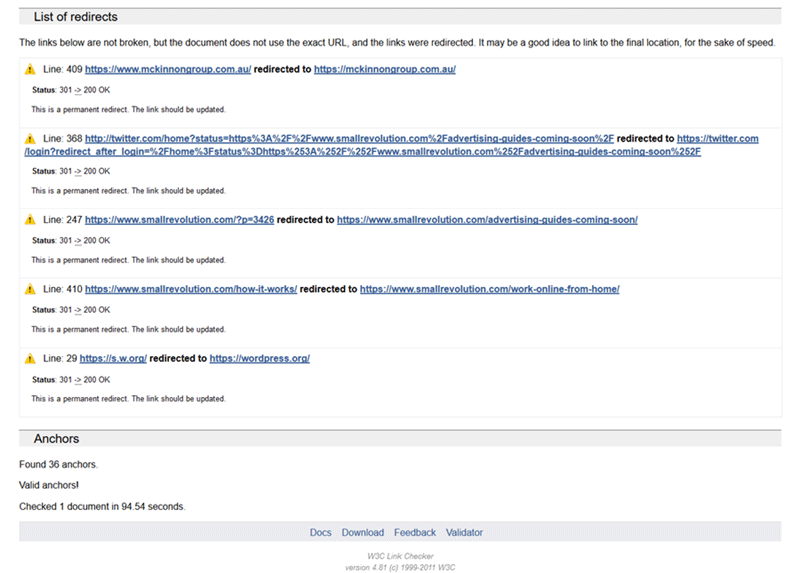
As for the 404 redirects you can simply click the 404 link to view which links are broken.
If you have too many 404 redirect occurrences, ask your webmaster to double check the links that you found on the W3C Link Checker report.
Also ask your webmaster to check the 301 redirects if you receive any error statuses on the “List of Redirects” section of the report.
Step 6: Check Your XML/HTML and Video Sitemaps On Google Webmaster Tools
A sitemap is actually just a simple way to organize and map a website which was used by visitors at first. But in 2005, Google used the XML format to enable search engines to find the data faster and index it more accurately.
An XML sitemap usually contains the entire map of the site with URLs along with other important information such as:
- Metadata
- How often the sitemap updates
- What is the relevance of the link to the other links of the site
- And so on
HTML sitemaps are usually made for the visitors to use for themselves for easy navigation of the website.
Video Sitemap is basically the same as sitemap except for videos on your site. Google Video Sitemaps is one of the biggest video search entities because of YouTube’s popularity.
With that in mind, having a video sitemap of your site is pretty handy since your videos from your store will show up on the video search engine results page.
NOTE: You can either put the video sitemap on your regular XML sitemap or a separate one
Video sources that are supported by this feature include:
- MTV
- Vimeo
- Dailymotion
- Google Video
- Blitp.tv
- YouTube
Just ask your webmaster if they have uploaded the sitemap in the root directory of your site so that it looks something like this, “http://example.com/sitemap.xml” or “http://www.example.com/sitemap.xml”.
You should also ask your webmaster if they have submitted your XML sitemap to Google Webmaster Tools and Bing Webmaster Tools along with your online store for search engine indexing.
To check if the XML sitemap of your site has been submitted to Google Webmaster Tools, just log in to your account and click on the site you want to check.
Once you’ve been taken to the site dashboard you will be able to see if you have submitted the XML sitemap to Google Webmasters Tool on the right side since it will be blank or show a graph as shown below.
You can also click on it to see more detailed information such as when was the most recent update to the sitemap and if there are any issues or problems with it.
NOTE: If you do have any warnings, it isn’t the end for your store. Just talk to your webmaster and see if the issues are critical and need to be addressed immediately or not.
TIP: One good idea is to put the location of your XML sitemap on your robots.txt file which we will talk about in the next step.
Step 7: Check If You Submitted Your Store’s XML Sitemap On Bing Webmaster Tools
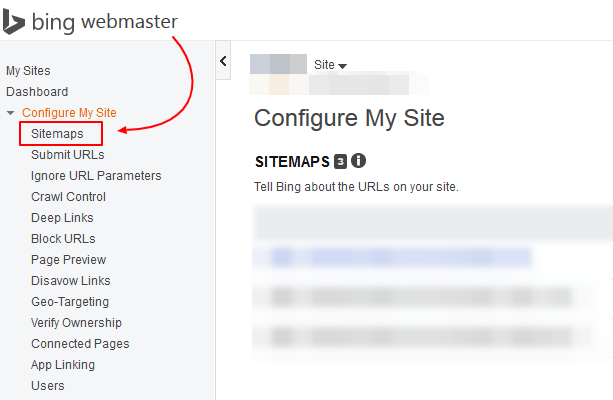
To check if your store’s XML sitemap has been submitted to Bing Webmaster Tools, simply login your account and click on the site dashboard as shown below.
Once you’re in the site’s dashboard, you just have to scroll down to the sitemap section and see if the sitemap has been successfully submitted or not.
If there are no sitemaps to be found on this section then you will have to talk to your webmaster about it and quickly submit a sitemap to Bing as soon as possible.
Step 8: Check If The Robots.txt Has Been Submitted To Google Webmaster Tools
Many people don’t know what robots.txt is or what it does for their site. Robots.txt is basically the instruction manual for web crawlers that tells them what parts of your site they are allowed to index and crawl for search engine results.
Some might argue that it isn’t needed but it is important for online stores since they contain a lot of pages and it may take a while for the entire site to be properly indexed and show up on search engine results.
There are a couple of things you need robots.txt to exclude on the search engine results page such as:
- Duplicate pages so that Google won’t penalize you.
- Private files on your root directory (like the the cgi-bin and this also makes it so that the web crawlers don’t use up your bandwidth when indexing)
- To restrict search result access to certain pages or content on your site.
Note that this isn’t a security method to hide important files or content since the robots.txt is a public file that can be accessed by anyone.
Talk to your webmaster if they have set up the robots.txt on your online store and if it has the proper inclusions and exclusions of your site that should and should not be crawled and indexed.
It is recommended to include every page on your store when creating and setting up your robots.txt file and that includes:
- Every product page
- About Us page
- FAQ page
- Landing or squeeze pages
- and so on
You can also check the robots.txt by yourself by logging into your Google Webmaster Tools account then clicking on the site which will lead you to the dashboard, as seen below.
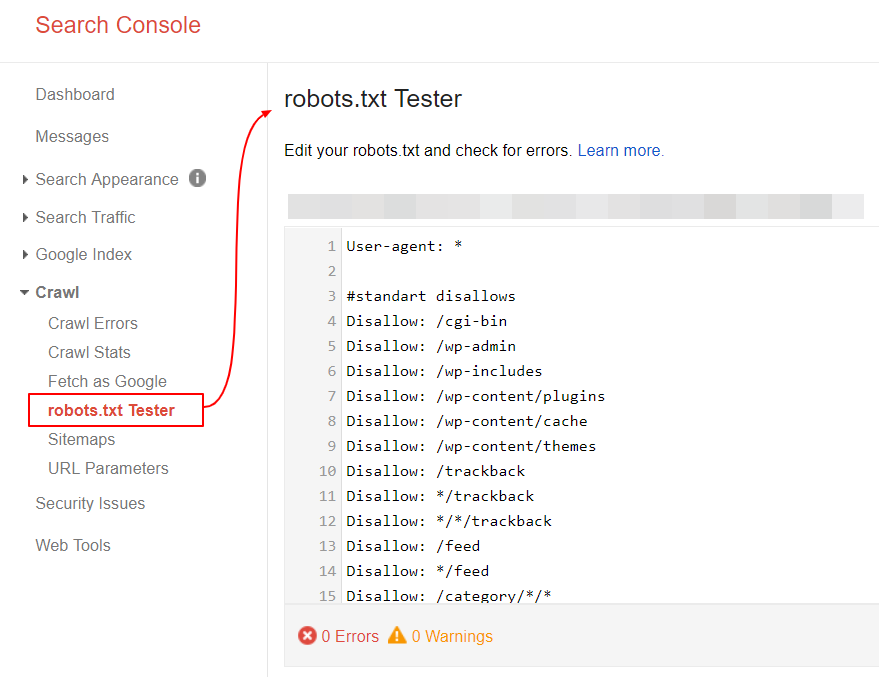
Don’t worry too much about the crawl errors, unless it is reaching to the hundreds and by then Google will have sent you an email regarding the errors, so check your email regularly.
By clicking on the “Crawl Errors” tab as show above, you can view the errors history and which links are having issues.
Talk to your webmaster about the errors you have seen and see if they can be fixed immediately.
Step 9: Check Your Social Media Integration
Social media has become a big part of the internet in the past couple of years and most people around the world use it every day.
This is why a lot of online store owners and businessmen in general use the power of social media to sell their products and promote their business as well.
To check for social media integration is mostly on the different plugins you will be using such as having the right URL for the share and like buttons and setting up the proper social media account links for different social media accounts including but not limited to:
- Google+
Check if the links have the correct spelling because this is one of the most common problems when linking your customers to the different social media accounts of your store.
TIP: Talk to your webmaster about this especially if they are not a native English speaker and this will sometimes cause some spelling and grammatical errors not only for your social media accounts but also the content on your store as well.
Also clicking on the social media links and buttons themselves and seeing if they actually redirect to your social media account is a fast and simple way to check if the link is working properly.
Final Checklist
We have finally arrived at the end of our guide on how to check the SEO of your site before the search engines penalize you.
But before we leave you to do all the steps mentioned, here is the final checklist so that you don’t skip out on anything important before your store goes live.
- Always have constant communication with your webmaster if you are not doing the SEO work for your online store. This will ensure that problems are addressed immediately or before they even show up.
- Make sure that you have a Google Webmaster Tools and Bing Webmaster Tools account and that you’ve submitted your store to them.
- Many of our steps require you to check using these tools.
- Regularly check the email that you are using for Google Webmaster Tools and Bing Webmaster Tools since they will send you messages regarding the errors and updates of your store.
- Use the W3C Link Checker to check the many links of your store. You will also detailed enough reports that you can tell your webmaster about it.
- Remember that error messages from Google or Bing doesn’t mean the end of the world for your online store.
- Just make sure you read them all and talk about them with your webmaster frequently.
- Make sure the robots.txt of your store is setup in the right location and submitted to Google and Bing Webmaster Tools.
- This will make it faster and easier for your store to be displayed by the search engines.
- Spelling errors are very common especially if your staff aren’t native English speakers.
- A lot of the errors from links are caused by this so make sure that to keep the spelling of your links is in check.
Photo by Freepik / CC BY
1 Comment
I’ve recently started a web site, the info you provide on this web site has helped me tremendously. Thank you for all of your time & work.