
The aim of this guide is to show you the exact steps you need to follow in order to set up a Facebook Page for your online store. Use it to work through the process quickly and efficiently.
Now that you’ve learned the difference of Facebook Profiles and Pages, you’re now ready to create one for your store. This will let you reach out to people and potential customers who are interested in your store and your products.
Interested people will become engaged with your posts and activities and this will create a bond between you and your customers, thus opening a more social and comfortable communication with them through posts and comments.
The more interaction there is, the more you attract potential buyers and increase the number of loyal customers.
Step 1: Log-In To Facebook
To create a Facebook Fan Page we first need to login to our Facebook profiles.
Often times, store owners would use their personal Facebook profiles to create Facebook pages. And then provide “admin” permissions to allow their employees to make changes to the store’s Facebook pages. And this can give your employee the ability to control them.
The risk here is that it may be vulnerable to privacy issues.
Use A Store Persona
It is better to use a “Store Persona” rather than your personal Facebook profile. A store persona is an account especially made for your store’s use.
You can make use of the store’s Gmail account so all your employees can have access to it without them having to access all your personal photos, posts and comments from your personal Facebook profiles.
Facebook is against fake accounts so it is important to use a real person. A person that represents your store. But it’s not that person’s actual private Facebook account.
This is against the Terms of Service from Facebook as they can disable your account and you will not be able to create another one without their permission so you need to be very careful.
It is important to keep the account as real as possible so Facebook won’t label it as fake. That means:
- You shouldn’t do anything spammy.
- It should at least have friends of its own.
- Have real profile pictures and post photos and comments.
- This Facebook account will be used to interact to everyone that’s related to your business.
- It should be active and working.
It is important not to sell on this Facebook Profile. Sell on your Facebook Page.
Step 2: Create A Page
To create a page, login using your store’s persona. Then go to https://www.facebook.com/pages/create/. You need to identify the nature of your store first and what you want to focus on your page so you can properly categorise it.
You can create a page for:
- Local Business or Place
- Company, Organization or Institution
- Brand or Product
- Artist, Band or Public Figure
- Entertainment
- Cause or Community
Step 3: Select A Category
Since we have an eCommerce store, the most common page we create are either Local Business or Place; Company, Organization or Institution; and Brand or Product.
Make sure you choose the right category for your store as this will help you with search rankings.
Choose Local Business or Place if your store are physically located in specific places/local address and falls under any of the following categories:
- Airport, Arts/Entertainment/Nightlife, Attractions/Things to Do, Automotive, Bank/Financial Services, Book Shop, Business Services, Church/Religious Organisation, Cinema, Club, Community/Government, Concert Venue, Doctor, Education, Event Planning/Services, Food/Grocery, Health/Medical/Pharmacy, Home Improvement, Hospital/Clinic, Hotel, Landmark, Lawyer, Library, Local Business, Museum/Art Gallery, Outdoor Gear/Sporting Goods, Pet Services, Professional Services, Property, Pub/bar, Public Places, Restaurant/Cafe, School, Secondary School, Shopping/Retail, Spas/Beauty/Personal Care, Sports Venue, Sports/Recreation/Activities, Tours/Sightseeing/Transport/University.
Choose Company, Organization or Institution if your store is not necessarily located in a specific address but mainly focus on people/profession, or if you have more than one store location and that it falls under any of the following categories:
- Aerospace/Defense, Automobile and Parts, Bank/Financial Institution, Biotechnology, Cause, Chemicals. Church/Religious Organisation, Community Organisation, Company, Computers/Technology, Consulting/Business Services, Education, Energy/Utility, Engineering/Construction, Farming/Agriculture, Food/Beverages, Government Organisation, Health/Beauty, Health/Medical/Pharmaceuticals, Industrials, Insurance Company, Internet/Software, Legal/Law, Media/News/Publishing, Mining/Materials, NGO’s, Non-Profile Organisation, Political Party, Retail and Consumer Merchandise, School, Secondary School, Small Business, Telecommunication, Transport/Freight, Travel/Leisure, University
Note: You can use Company, Organization or Institution category is preferred for eCommerce stores when you only sell online and only through your website.
Choose Brand or Products if your store specifically focuses on promoting and marketing specific brands or products that are sold through other websites (ie: Nike, Adidas, Gap etc..) and that it falls under any of the following categories:
- App Page, Appliances, Babdy Goods/Kids Goods, Bags/Luggage, Board Game, Building Materials, Camera/Photo, Cars, Clothing, Commercial Equipment, Computers, Drugs, Electronics, Food/Beverages, Furniture, Games/Toys, Health/Beauty, Home Decor, Household Supplies, Jewelry/Watches, Kitchen/Cooking, Office Supplies, Outdoor Gear/Sporting Goods, Patio/Garden, Pet Supplies, Phone/Tablet, Product/Services, Software, Tools/Equipment, Video Game, Vitamins/Supplements.
Example: For the store “Pretty Flowers”, it’s best to put the page under Local Business.
Step 4: Provide Needed Information
After you selected the right category and the Product name, click on Get Started and you’ll be provided with options to add distinct information about your page. Here are the needed information: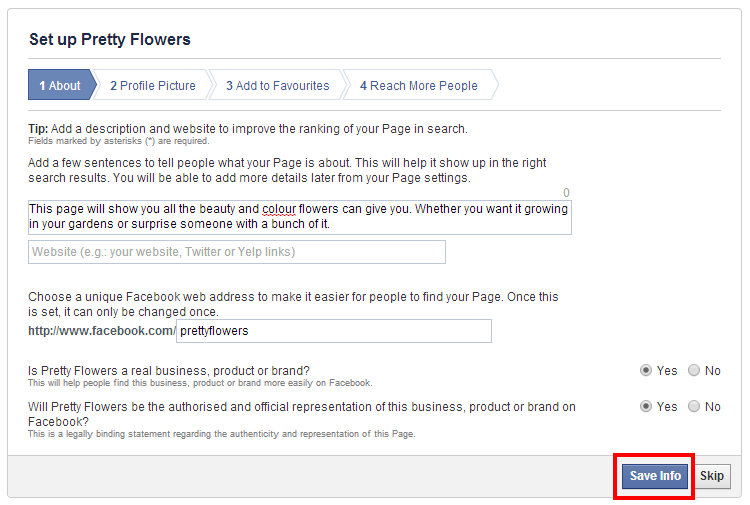
A. Descriptions
You need to create a short description about what the page is all about. about your page and to create a unique Facebook web address, add a great looking profile picture and options to add the page to your favourites and reach out to people.
B. Facebook URL (web address)
You need to choose a short and unique web address so people can easily find your page on Facebook. Facebook only allows you change this ONLY ONCE so you need to very careful in selecting the URL for your Fan Page.
If you’re not yet prepared for a good quality URL/web address, you can skip this step and do it later. You can read the next post “Customize Your Facebook Fan Page URL” to help you decide on what URL/web address to use “
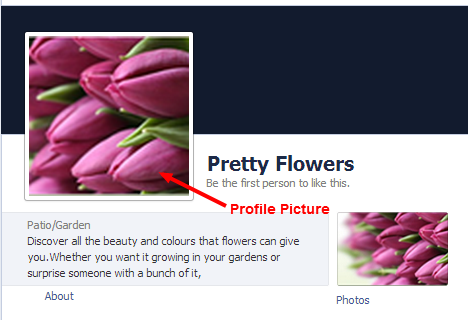
C. Profile Picture
This photo will identify your Page and you’ll be using this as your photo when you like posts, comments and anything on Facebook so make sure that this photo is great looking as this will represent your store. You can use your store’s logo as well.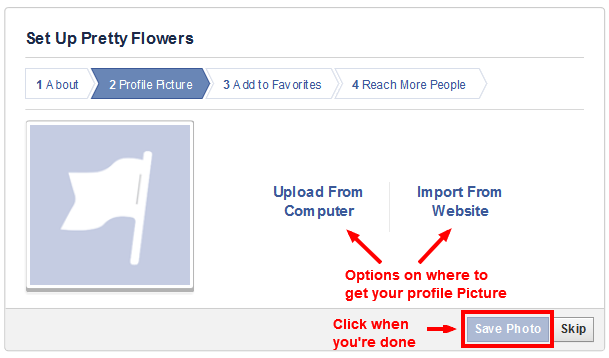
D. Add To Favourites
To make it easier for you to find your page, you can add it to your Favourites. That way, it will be available at the very top of your left side bar on your Facebook Profile. You can skip this step if you think it’s not necessary or you prefer to do it at a later date.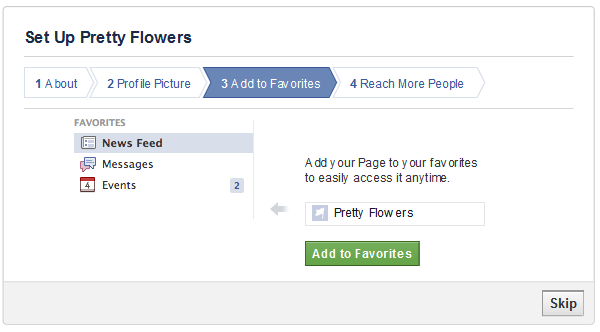
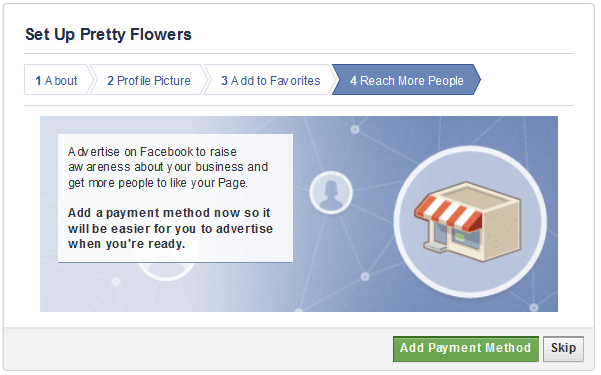
E. Reach More People
Facebook has this option where you can advertise your products on Facebook and let your page be available to more people.
However, this comes with a payment. It is recommended to do this only when you feel that the page is ready and complete. So skip this step at the moment.
With just these information, you can already have your Facebook Fan Page live and published.
Final Checklist
Here is a short checklist to help you remember how to create and configure your Facebook page that is suitable for your store:
- Login to Facebook using your store persona.
- Create your Facebook page using the exact or closest category.
- Provide needed information, interesting descriptions and cover photo for your store.
- Skip unnecessary steps like adding to Favourites and reaching more people until the entire Facebook Page is ready.