
The aim of this guide is to help you and/or your freelance writers learn from and follow a very successful blog format. List-based posts have been popular since the very beginning of the Internet and are very easy to create. Schedule at least 1 list-based post into your store’s blog each week.
List-based blog posts are the most popular kind of articles on the internet. Not only are they easy-to-read and skim-friendly, its format also makes it easy for readers to form opinions, comment, and share.
For these reasons, list-based blog posts are great tools for your eCommerce business. Whether you are creating a list of your best products, a list of how to use your products, or a list of why people should use your products, your readers will enjoy and learn a lot from your article.
Check out these examples:
5 Foods To Increase Your Omega-3 Intake
- With a list-based article, the online store Nuts enumerates products that contain Omega-3. Each item on the list links back to their online store where readers can purchase the product.
10 Things We Love About Portland
- Although the items on this list are not directly related to the products sold on the online store Grovemade, their market can easily relate to the topic and will likely share it on their social media accounts, creating more traffic for Grovemade’s website.
There are several factors that make a list-based blog post informative and interesting:
- an accurate and keyword-rich title
- visible headers for each item arranged logically
- a conclusion that leaves a strong impact, among others
In this guide, you will learn how to write your own effective list-based article. By following these steps, you will be able to create a list that will surely give your eCommerce business a boost.
Step 1: Identify Your Readers
Who are you writing for? What kind of customers will be reading your posts?
Write them down once you have identified them and keep them in mind as you write your list.
Step 2: Identify Your Objective
What is the aim of your list? What do you want your audience to learn after reading your article?
This will serve as a guide or general outline so you won’t be tempted to stray off-track of your topic. Write down your objective and come back to it if you are not sure of what to include and what not to include in your list.
Most importantly, for every article, our aim is to somehow promote our own products and provide links to product pages or categories.
You can always write any article that you can think of, but the question is, is this topic related to my business? Would this promote my products? These should be kept in mind while writing list-based posts.
Step 3: Create A Working Title
A working title is the initial title of your article as you are writing it. It doesn’t have to be perfect and may change as you go on writing but it will also serve as a guide to keep you on-topic.
Once you have finished your list, come back to this and check if the title accurately describes your list. If not, rewrite it.
It may also be helpful to write down several working titles so that you are not limited to just one.
Always include a number in your title.
Step 4: Create A Template For The List
Your template or outline will serve as a guiding format of your list-based blog post. It consists of the following:
- Introduction – Describes what the list is and what readers can learn from it
- Body – Enumerates each item in your list, provides descriptions and examples
- Conclusion – Ends the list with a reflection of what readers have learned
When creating an outline, refer to Step 2; what is your list about and what do you want your readers to learn?
Brainstorm ideas for what items should be included in the list.
Step 5: Write The Introduction
The introduction is what will draw in your audience to continue reading your list.
A good example of an introduction can be found in the article Best 5 Mail Order Steaks for the Lazy Grill Master from online men’s clothing store Ball and Buck.
Refer to this example and follow these steps for writing an introduction:
1: Write an opening line that catches the interest of your readers
“If you love to grill but don’t love to stand in line at the grocery store, you will benefit from finding a great place to order some mail order steaks.”
- The opening sentence draws the reader in by empathizing with them and letting them know there is useful information in the list. Nobody likes standing in line at the grocery store therefore they will want an easier alternative.
- To write a compelling first sentence, you may also ask your readers a question; “Do you love to grill but hate having to go to the grocery store and wait in line?”, or convince them of an idea; “Everyone loves steak, but nobody likes waiting in line at the grocery store…”
2: Explain more about the list and provide simple examples
“With a little help from the Internet and efficient shipping services available, getting great steaks delivered to your door at an affordable price is now easy.“
Discuss more about what the content of the list is and why it can be useful.
3: Transition into the body
“Among the huge number of online meat vendors, the five below have proven themselves to be the best mail order steaks you can eat:”
This last line in the introduction lets readers know that they are about to read the actual list and it makes them want to keep reading. It also serves as a transition into the body of the blog post.
Remember that the introduction should be interesting and compelling enough for your readers to want to continue on to your list.
You may also opt to write the introduction last after you have finished writing the items on the list. Then you will know what the actual content is and it will be easier to introduce it.
Step 6: Write The Body
The body is the meat of your list-based blog post. This is what your readers actually want to know. Make sure it is consistent with what was said in the introduction.
The list will be made up of a combination of items in bullets, numbers, headers, or paragraphs. Format it in such a way that will be the easiest to understand.
The blog post by Nuts, 5 Foods to Increase Your Omega-3 Intake, is another good example of a list-based article. Refer to this item on their list and follow these steps for writing the body.
1: Use a header to make each step more visible to readers and label them appropriately
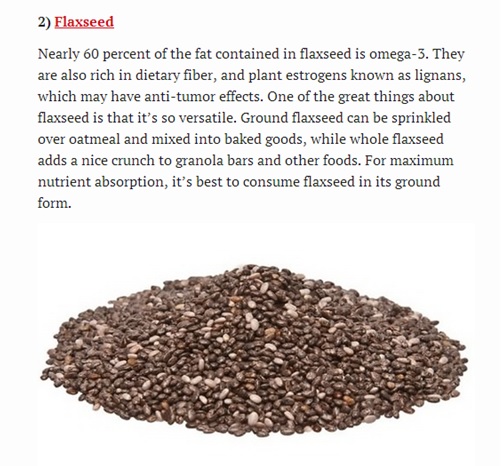
- In the example, Flaxseed is numbered and bolded. This makes it more visible to readers.
- Make the title of each item as short as possible. You will be talking more about the item in the description.
2: Discuss each item on the list and provide examples for each
- When writing descriptions, keep in mind what your readers want to know and write in a language they will understand. For example, the description discusses the nutrients in Flaxseed and what they are for. Though it may use uncommon terms like “lignans”, it also explains what it is “which may have anti-tumor effects”.
- The description also talks about serving suggestions for flaxseed “Ground flaxseed can be sprinkled over oatmeal and mixed into baked goods…”
3: Hyperlink to other resources
- Hyperlinking increases visibility in search engines, making your article easier to find.
- If you are creating a list of your own products, hyperlink to your own online store. In the example, each item is linked back to the Nuts store where readers can purchase them.
4: Arrange items accordingly, following a consistent format
- Organize items in a logical manner; either from most popular to least popular, least popular to most popular, or alphabetically. Decide on an order that will encourage your audience to keep reading.
- A consistent format also makes it easier for readers to understand.
Step 7: Write The Conclusion
There are several ways you can conclude your list-based blog post.
- Give your readers a recap of what they have learned by referring to your notes from Step 2. Only do this if you have not discussed it in the introduction
- Keep it short by asking them a question
- Pick a call-to-action
You may also include all three of these in your conclusion. The most important thing is to leave an impression and remind the readers that they have gained new knowledge through your list.
A good example of a conclusion can be found in the article 10 Things We Love About Portland by the Portland-based handicraft eCommerce store Grovemade:
“See, it’s your favorite city now, isn’t it?”
It is a one-sentence conclusion but leaves an impression on readers. It is also a good way to wrap up the article.
Never end a list-based article without a conclusion. Let the readers know that they have read the entire list.
1: Summarize how the list has benefited your readers
This part of the conclusion should remind readers of what they have learned or how it can be useful to them. Write this only if you did not include it in the introduction so as not to be redundant.
2: Ask them a question or finish with a strong sentence
- As in the example above, the last or only sentence in the introduction must leave an impression on readers. Ask them questions that end with “…don’t you?” or “…isn’t it?”
- You may also ask them questions like “What are your favorite ABCD?” or “What do you think of ABCD?” This will encourage them to leave comments.
3: Include a call-to-action
This is your chance to ask your readers to share your article, like your Facebook page, or follow your Twitter.
Step 8: Edit And Finalize Your List-Based Blog Post
Read and reread your entire list-based blog post. Correct any errors you may have made and improve anything that needs improvement.
1: Ask someone to your list
An outsider’s opinion can give you a fresh perspective of your article and will help you find more ways to improve it.
2: Finalize your title
Is your working title still in line with your list? If not, change it. Make it more accurate and interesting.
3: Choose an image
This will serve as a thumbnail and click-through for your article and will appear on your blog and when it is shared on social media. Make sure that it is eye-catching but also represents your article well.
After completing this step, you’re ready for publishing!
Additional Guidelines
Here are a few more things to remember when writing your list-based blog post:
- Do not limit yourself to a certain number. This is the reason why it is good to start with a working title and fine-tune it later on once the entire list is complete.
For example, you might start with an article titled “5 Reason to Wear Foundation” but later find that there are actually 8 good reasons or only 3 good reasons. - Be wary of the length of your blog post. If you are creating a list of 10 items, do not make the description for each item too long. Include only exactly what the readers need to know. If the list contains only 3 items then you may go into more detail and provide more information.
Additionally, descriptions should be more or less the same length. Do not write 250 words for one item and only 50 words for another. - Provide examples. To elaborate on each item, use examples to clearly show your readers what you are talking about.
- Optimize the Post for Search Engines. Optimizing your list-based blog post will make it easier for your audience to find it. A simple way to do this, aside from hyperlinking to other sources, would be to create a title that is keyword-rich, placing the most important keyword as close to the beginning of the title as possible.